Imagine the sonic crackle of cold, translucent crustacean flesh meeting a searing stainless steel basin. This is not merely dinner; it is a high-speed collision of amino acids and reducing sugars. When you execute a Multi Cooker Shrimp Scampi, you are managing a delicate architectural balance between the snap of the protein and the emulsification of a lipid-heavy sauce. Most home cooks turn their shrimp into rubberized pencil erasers by ignoring the thermal momentum of the vessel. We are here to audit that failure out of your system. We want a sauce so viscous it clings to the pasta like a velvet glove, punctuated by the piquant sting of garlic and the bright, acidic lift of dry white wine. This audit demands precision. We are leveraging the concentrated heat of the multi-cooker to induce a rapid Maillard reaction before the internal temperature of the shrimp exceeds the critical threshold of 120 degrees Fahrenheit. Prepare your station; we are about to transition from raw inventory to a masterpiece of rapid acid-lipid emulsion.
THE DATA MATRIX
| Metric | Specification |
|---|---|
| Prep Time | 15 Minutes |
| Execution Time | 8 Minutes |
| Yield | 4 Servings |
| Complexity | 4 / 10 |
| Estimated Cost per Serving | $6.50 USD |
THE GATHERS
Ingredient Protocol:
- 900g / 2 lbs Large Shrimp (16/20 count), peeled and deveined
- 60ml / 4 tbsp Unsalted High-Fat Butter
- 30ml / 2 tbsp Extra Virgin Olive Oil
- 6 cloves Garlic, microplaned or finely minced
- 120ml / 0.5 cup Dry White Wine (Pinot Grigio or Sauvignon Blanc)
- 15ml / 1 tbsp Fresh Lemon Juice
- 5g / 1 tsp Red Pepper Flakes
- 15g / 0.5 oz Fresh Italian Parsley, chiffonade
- 500g / 1.1 lbs Linguine or Angel Hair pasta (cooked separately)
- 5g / 1 tsp Kosher Salt (Diamond Crystal preferred)
Section A: Ingredient Quality Audit:
The primary failure point in scampi is the moisture content of the shrimp. If your shrimp are "plumped" with sodium tripolyphosphate, they will purge water into the pan, steaming rather than searing. Technical Fix: Thoroughly pat the shrimp dry with lint-free towels and salt them five minutes before cooking to draw out surface moisture. If your garlic lacks the necessary allicin punch, do not use the pre-minced jarred variety; the sulfur compounds have already oxidized. Always use a microplane to create a paste, which increases surface area and ensures the garlic integrates into the emulsion rather than remaining as bitter, burnt chunks.
THE MASTERCLASS
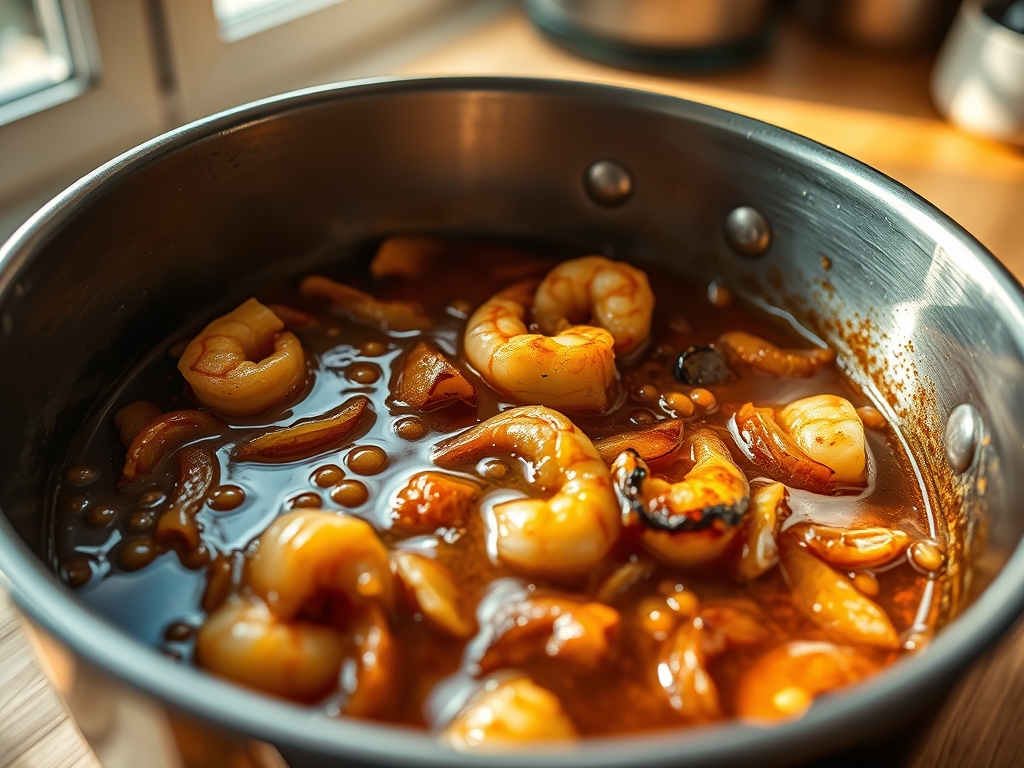
1. Thermal Priming and Lipid Infusion
Set your multi-cooker to the highest "Sauté" or "Brown" setting. Add the olive oil and half of the butter. Once the butter solids begin to foam and turn slightly golden, add the red pepper flakes. This process allows the capsaicin to infuse into the fat, ensuring a consistent heat profile throughout the final sauce.
Pro Tip: Use a digital infrared thermometer to ensure the surface of the pot reaches at least 375 degrees Fahrenheit before adding the shrimp. This ensures an immediate sear, preventing the protein from sticking to the stainless steel liner.
2. The High-Velocity Sear
Add the shrimp in a single layer. Do not crowd the vessel, as this drops the temperature and leads to boiling. Cook for exactly 60 to 90 seconds per side until the edges turn opaque and pink. Remove the shrimp immediately using a slotted spoon and set them aside on a warm plate.
Pro Tip: Use a bench scraper to quickly clear any stray bits from the bottom of the pot between batches. Maintaining a clean cooking surface prevents "off" flavors from carbonized protein fragments.
3. Deglazing and Aromatics
Add the garlic to the residual fat and stir constantly for 30 seconds. Before the garlic turns brown, pour in the white wine. Use a wooden spatula to deglaze the bottom of the pot, scraping up the "fond" (the browned bits) which contains concentrated umami.
Pro Tip: Measure your wine using a graduated cylinder or digital scale for total accuracy. Too much liquid will prevent the sauce from reaching the desired viscous consistency during the reduction phase.
4. The Emulsion Phase
Allow the wine to reduce by half. Turn the multi-cooker to the "Keep Warm" or lowest setting. Whisk in the remaining cold butter one tablespoon at a time. This is a classic French technique where the cold fat creates a stable lipid emulsion with the acidic wine and lemon juice.
Pro Tip: Use a silicone-coated whisk to avoid scratching the interior of your multi-cooker. The goal is to aerate the sauce slightly, creating a glossy, pale yellow sheen that indicates a successful suspension of fat in liquid.
5. Final Integration
Return the shrimp and any accumulated juices to the pot. Toss with the cooked pasta and fresh parsley. The residual heat will finish cooking the shrimp to the perfect internal temperature of 145 degrees Fahrenheit without making them tough.
Pro Tip: Use heavy-duty kitchen tongs to lift and fold the pasta. This ensures every strand is coated in the emulsion without breaking the delicate shrimp bodies.
Section B: Prep & Timing Fault-Lines:
The most common human error is the "Lag Time" between the sauce completion and the pasta readiness. If the sauce sits too long in a multi-cooker on "Keep Warm," the emulsion will break, causing the butter to separate into a greasy film. Technical Fix: Always time your pasta to finish two minutes before the sauce. Transfer the pasta directly from the boiling water to the multi-cooker; the residual pasta water (rich in starch) will further stabilize your scampi sauce.
THE VISUAL SPECTRUM
Section C: Thermal & Visual Troubleshooting:
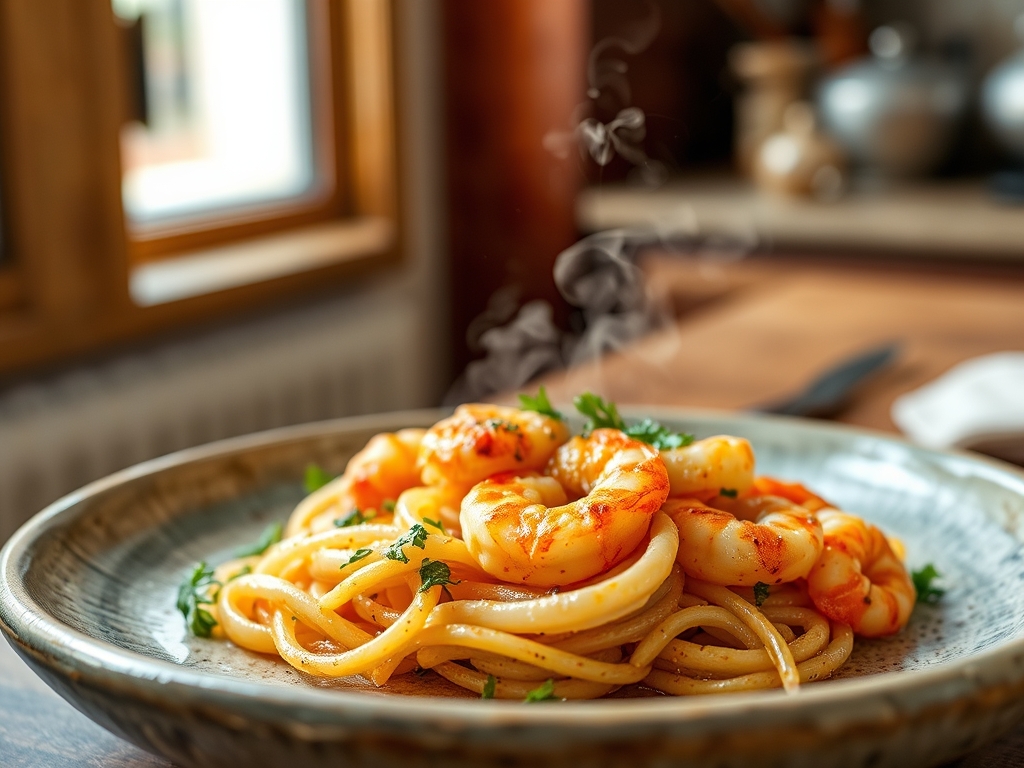
Referencing the Masterclass photo, your Multi Cooker Shrimp Scampi should exhibit a vibrant, translucent orange hue on the shrimp with distinct charred "freckles" from the sear. If your shrimp look dull or grey, your initial heat was too low. If the sauce appears broken or oily rather than creamy, you added the butter while the liquid was boiling. Technical Fix: To restore a broken sauce, add a teaspoon of hot pasta water and whisk vigorously to re-emulsify the fats. The final dish should have a "high-gloss" finish, reflecting light off the curved surfaces of the shrimp.
THE DEEP DIVE
Macro Nutrition Profile:
A standard serving provides approximately 35g of protein, 18g of fat, and 45g of carbohydrates (if served with pasta). The high protein-to-calorie ratio makes this an excellent recovery meal, provided the butter content is monitored.
Dietary Swaps:
- Vegan: Replace butter with a high-quality cashew cream and use a dry vegetable stock instead of wine if alcohol-free is required.
- Keto: Swap the pasta for zoodles or spaghetti squash. The high-fat sauce is perfectly compliant.
- GF: Ensure your pasta is a corn or brown rice blend; the sauce itself is naturally gluten-free.
Meal Prep & Reheating Science:
Shrimp are notoriously difficult to reheat because the microwave vibrates water molecules, essentially steaming the protein from the inside out and destroying the molecular structure. To reheat, place the scampi in a pan over low heat with a splash of water. Cover and steam gently for 2 minutes to preserve the viscous texture of the sauce.
THE KITCHEN TABLE
Can I use frozen shrimp for this audit?
Yes, provided they are completely thawed and dried. Frozen shrimp often contain extra moisture, so increase your "pat dry" time. Failure to do so will result in a watery, broken emulsion.
What if I do not have white wine?
Substitute with a high-quality chicken bone broth and an extra squeeze of lemon. The acidity is vital for breaking down the richness of the butter and creating a balanced flavor profile.
Why is my garlic bitter?
You likely over-browned it during the sauté phase. Garlic contains sugars that carbonize quickly. If it turns dark brown, discard the batch, wipe the pot, and start over. Precision is non-negotiable.
How do I get the sauce to stick to the noodles?
Never rinse your pasta. The surface starch is the "glue" that allows the lipid emulsion to adhere. Drag the pasta directly from the boiling water into the multi-cooker for maximum adhesion.