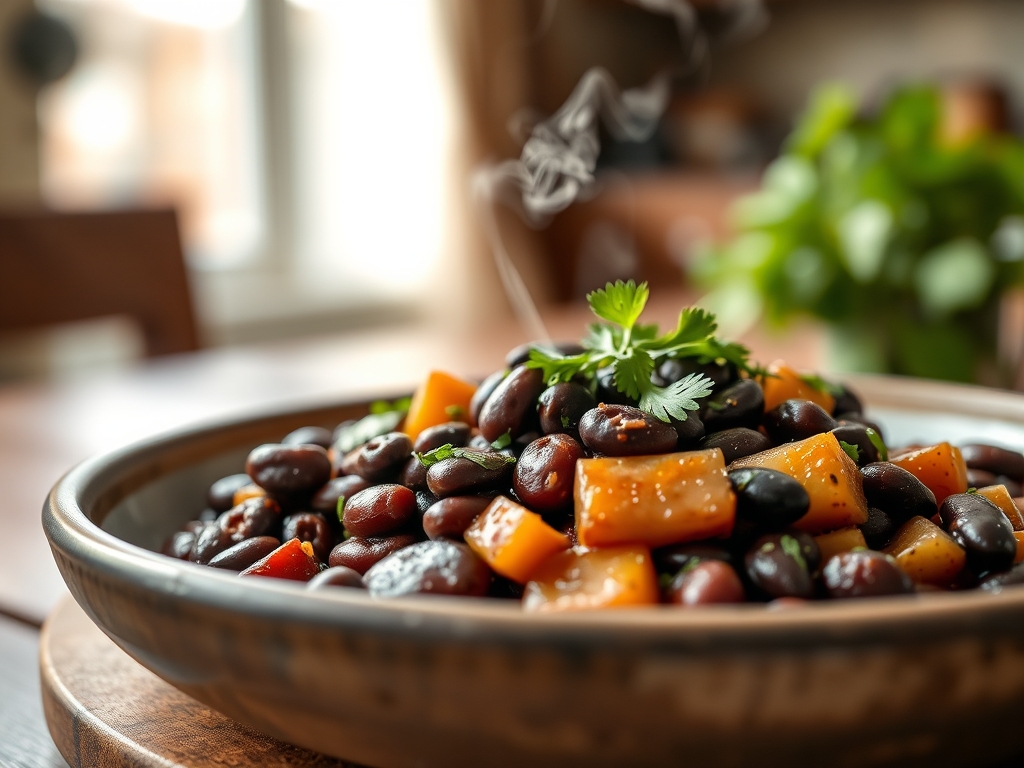
Forget the archaic ritual of the overnight soak; we are reclaiming forty-eight hours of your life through the sheer force of atmospheric pressure. Most home cooks approach legumes with a sense of dread, fearing the digestive fallout of improperly neutralized lectins or the grainy, chalky texture of undercooked skins. We are here to audit that failure. When you engage the high-pressure cycle for Instant Pot Black Beans, you are not just cooking; you are conducting a high-velocity molecular intervention. The sound of the steam release is the sound of victory over stubborn cellulose. Imagine a bowl of obsidian pearls, each one encased in a skin that yields to the slightest pressure while maintaining a structural integrity that would make an architect weep. The aroma is earth and smoke, a dense and viscous perfume that fills the kitchen as the pressure vessel forces seasoned liquid into the very marrow of the bean. This is the infrastructure of efficiency, where raw hardware meets biological necessity to produce a result that is creamy, savory, and perfectly digestible in under an hour.
THE DATA MATRIX
| Metric | Specification |
|---|---|
| Prep Time | 5 Minutes |
| Execution Time | 45-55 Minutes (including natural release) |
| Yield | 1.4 kg / 6 Cups |
| Complexity (1-10) | 2 |
| Estimated Cost per Serving | $0.28 USD |
THE GATHERS
Ingredient Protocol:
- 450g / 1 lb Dry Black Beans (Unsoaked)
- 1.4L / 6 cups Filtered Water or Low-Sodium Vegetable Stock
- 15ml / 1 tbsp Extra Virgin Olive Oil (to prevent foaming)
- 10g / 2 tsp Kosher Salt
- 3g / 1 tsp Cumin Seeds (to infuse the base)
- 2 Large Cloves of Garlic (smashed)
- 1 Dried Bay Leaf
- 1 Small White Onion (halved)
Section A: Ingredient Quality Audit:
The primary failure point in legume infrastructure is the "Zombie Bean." If your beans have been sitting in a pantry since the previous administration, no amount of pressure will soften the lignified cell walls. Check for a dusty sheen or cracked skins; these are signs of excessive dehydration. To fix a batch of older beans, add 1.25g / 1/4 tsp of baking soda to the liquid. This alkaline shift increases the solubility of hemicellulose, allowing the skins to soften in record time. Furthermore, always utilize filtered water. High mineral content (hard water) contains calcium and magnesium that bind to the pectin in bean skins, creating a permanent structural barrier that prevents the interior from becoming creamy.
THE MASTERCLASS
1. The Debris Sweep and Hydration Load
Place your dry beans on a clean workspace and use a bench scraper to move them in small batches, checking for stones or shriveled stowaways. Transfer the vetted beans to a fine-mesh strainer and rinse under cold water until the runoff is clear. Transfer the beans directly into the stainless steel inner pot of your pressure cooker.
Pro Tip: Using a digital scale for the water-to-bean ratio is superior to volumetric cups. A 3:1 ratio by weight ensures enough liquid to allow for the massive expansion of the starch granules without the beans becoming a dry, scorched mass at the bottom of the vessel.
2. Aromatics and Anti-Foam Integration
Add the halved onion, smashed garlic, bay leaf, and cumin seeds. Pour in the oil. The addition of lipids is a technical necessity; it breaks the surface tension of the cooking liquid, preventing the starchy foam from rising and clogging the steam release valve. This ensures a clean, safe cycle.
Pro Tip: To maximize the piquant profile of your spices, toast the cumin seeds in a small saucier for 60 seconds before adding them to the pot. This heat triggers the release of essential oils, ensuring the flavor penetrates the core of the bean rather than just sitting on the surface.
3. The High-Pressure Convergence
Secure the lid and ensure the venting knob is set to the "Sealing" position. Program the unit for 30 minutes at High Pressure. Once the timer expires, do not touch the valve. Allow for a 20-minute Natural Pressure Release (NPR). This slow decline in temperature prevents the beans from exploding due to a sudden change in internal pressure.
Pro Tip: The physics of the NPR is critical for texture. A "Quick Release" causes the liquid to boil violently inside the bean, shattering the delicate skins and turning your sophisticated audit into a bowl of mush. Patience is the ultimate professional tool here.
Section B: Prep & Timing Fault-Lines:
The most common timing error occurs when cooks forget to account for the "Pre-heat" phase. The Instant Pot requires approximately 10 to 12 minutes to reach the necessary atmospheric pressure before the countdown begins. If you are serving this for a timed event, calculate a total "wall-clock" time of 65 minutes. If your beans are still slightly "al dente" after the full cycle, simply simmer them on the "Sauté" setting for 5 minutes with the lid off to evaporate excess liquid and finish the softening process.
THE VISUAL SPECTRUM
Section C: Thermal & Visual Troubleshooting:
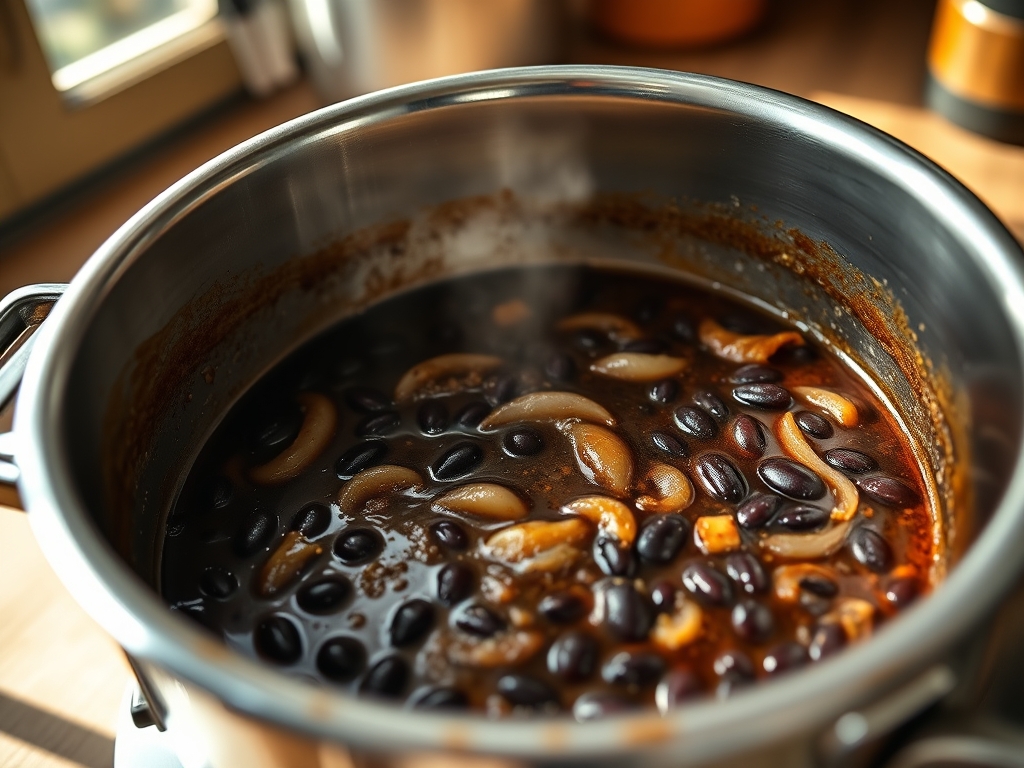
Referencing the Masterclass photo above, notice the deep, midnight hue of the liquid. This is not just water; it is a "pot liquor" enriched by the pigments and starches released during the cycle. If your beans look grey or faded, you likely over-rinsed them or used beans that were bleached by sunlight. If the skins are curling away from the flesh, your salt was added too late or the pressure was released too quickly. A perfect batch should look like the image: glossy, intact, and submerged in a liquid that has begun to render into a thin gravy. If the liquid is too thin, use a wooden spoon to mash a half-cup of beans against the side of the pot and stir; this releases internal starches to aerate and thicken the sauce instantly.
THE DEEP DIVE
Macro Nutrition Profile:
Black beans are a nutritional powerhouse, offering approximately 15g of protein and 15g of fiber per cooked cup. They are low on the Glycemic Index, meaning the complex carbohydrates provide a sustained energy release rather than a glucose spike. The high pressure effectively neutralizes lectins and phytates, which are the "anti-nutrients" responsible for digestive distress in many individuals.
Dietary Swaps:
- Vegan: Use vegetable stock or mushroom bouillon for a deep umami base.
- Keto: While beans are generally high-carb, you can reduce the serving size to 1/4 cup and pair with high-fat avocado and sour cream to fit within specific macro limits.
- GF: Naturally gluten-free, but ensure your spices are not processed in a facility with wheat.
Meal Prep & Reheating Science:
When black beans cool, the starches undergo "retrogradation," becoming more resistant. This is excellent for gut health but can make the beans feel stiff. When reheating, add a splash of water or stock to the bowl. Cover and microwave or heat on a stovetop until the internal temperature reaches 165F. This heat re-gelatinizes the starches, restoring the original creamy texture.
THE KITCHEN TABLE
Why are my beans still hard after 30 minutes?
Old beans or hard water are the usual suspects. Add a pinch of baking soda and run for another 5 minutes on high pressure. In the future, ensure your bean purveyor has a high turnover rate.
Can I add salt at the beginning?
Yes. The myth that salt toughens beans is a culinary ghost story. Salting the cooking water actually helps the skins soften more evenly by replacing calcium ions in the pectin with sodium ions, which are more soluble.
Do I need to discard the cooking liquid?
Absolutely not. That liquid is liquid gold, filled with flavor and nutrients. Use it as a base for black bean soup or as the hydrating liquid for a batch of Mexican red rice to infuse color.
What if I want to add acidity?
Wait until the very end. Adding lime juice or vinegar before the pressure cycle will keep the beans permanently hard. Acid strengthens the cell walls of legumes, so only deglaze or season with acids once the beans are fully tender.