Forget everything you know about the slow, agonizing wait of a boiling pot of water. We are no longer tethered to the atmospheric limitations of sea-level simmering. In this kitchen, we operate under the laws of the steam jacket; a high-pressure environment where moisture is forced into the cellular matrix of every kernel at a rate that would make a traditional stovetop weep. When we discuss Instant Pot Corn on the Cob, we are not just talking about a side dish; we are talking about the thermal optimization of Zea mays. The goal is a snap that resonates through the jawbone and a sugar release that borders on the intoxicating. By utilizing a sealed pressure vessel, we bypass the evaporative cooling that plagues open-air boiling. We are locking in the volatiles, ensuring that the corn's natural essence does not leach into a gallon of gray water. This is precision engineering applied to the harvest. We are looking for that perfect, golden-hued luster and a texture that is tender yet structurally sound. Prepare your palate for a systematic upgrade in vegetable preparation.
THE DATA MATRIX
| Metric | Specification |
|---|---|
| Prep Time | 5 Minutes |
| Execution Time | 2 Minutes (High Pressure) |
| Yield | 4 Units (Adjustable) |
| Complexity (1-10) | 2 |
| Estimated Cost per Serving | $0.75 USD |
THE GATHERS
Ingredient Protocol:
- 4 Large Ears of Fresh Corn; husks and silk removed.
- 250ml / 1 cup Filtered Water.
- 60g / 4 tbsp Unsalted High-Fat Butter.
- 5g / 1 tsp Fine Sea Salt.
- 2g / 0.5 tsp Smoked Paprika (optional for finish).
- 15ml / 1 tbsp Fresh Lime Juice.
Section A: Ingredient Quality Audit:
The primary failure point in this protocol is the age of the specimen. Once harvested, the sugars in corn begin a rapid conversion into starch. If your kernels feel doughy or lack a certain viscous interior, they have sat on the shelf too long. To fix this, you can add 5g of granulated sugar to the cooking liquid to artificially boost the glycemic profile. Furthermore, if the husks are desiccated, the corn has lost internal moisture. In this case, increase your water volume by 50ml to ensure the steam cycle does not run dry before the pressure seal is achieved. Always use a digital scale for your butter and salt ratios; guessing leads to inconsistent seasoning distribution.
THE MASTERCLASS
1. Hydraulic Foundation and Rack Placement
Place the stainless steel trivet into the inner pot and pour in your 250ml of filtered water. Arrange the corn in a cross-hatch pattern to allow for maximum steam circulation around each ear.
Pro Tip: This arrangement ensures that the steam can infuse the kernels evenly. If you stack them too tightly, you create thermal cold spots. Use a bench scraper to clean any stray corn silk from your workspace to maintain a sterile, professional environment.
2. Pressure Seal and Temporal Calibration
Secure the lid and ensure the venting knob is set to the "Sealing" position. Program the unit for 2 minutes on High Pressure. The real magic happens during the "come to pressure" phase, where the internal temperature climbs past the boiling point.
Pro Tip: The laws of thermodynamics dictate that higher pressure equals higher temperature. This rapid heat transfer prevents the cell walls from becoming mushy. Use a digital timer to track how long your specific machine takes to reach pressure; this helps in future kitchen scheduling.
3. The Rapid Depressurization Manifold
Once the timer expires, perform an immediate Manual Pressure Release. Do not let it sit on Natural Release, or the residual heat will overcook the sugars and lead to a rubbery texture.
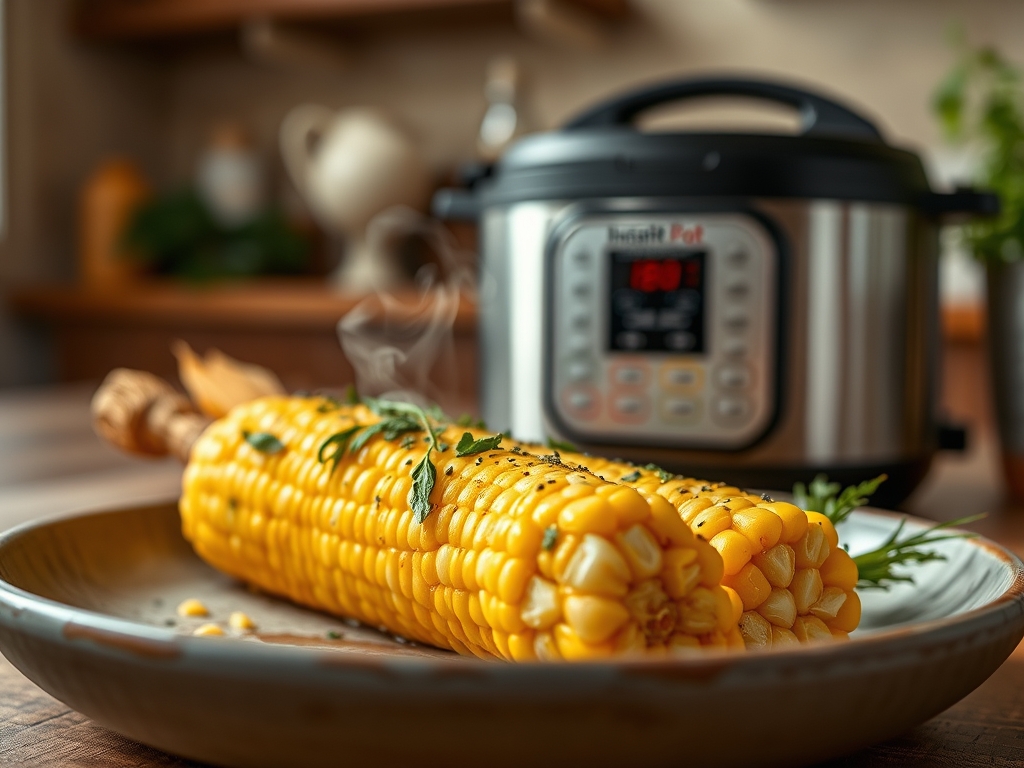
Pro Tip: Use a long-handled utensil to toggle the valve to avoid steam burns. Rapid venting stops the cooking process instantly, preserving the vibrant yellow color seen in the reference photo. Professionals often use a saucier to melt the butter simultaneously during this two-minute window.
4. The Emulsion Finish
Remove the corn using silicone-tipped tongs. While the corn is radiating heat, roll each ear in the melted butter, lime juice, and salt mixture.
Pro Tip: To create a truly piquant finish, whisk the butter and lime juice vigorously to aerate the fat before coating. This creates a light, velvety emulsion that clings to the kernels rather than sliding off into the bottom of the dish.
Section B: Prep & Timing Fault-Lines:
The most common human error is the "delayed release." If you leave the corn in the pot for even five minutes after the cycle ends, the starch granules swell excessively, ruining the "pop" of the kernel. If you find your corn is consistently tough, check your altitude settings; high-altitude environments may require a 15 percent increase in execution time. Always calibrate your pressure cooker's seal; a worn gasket allows steam to escape, leading to uneven cooking and potential "burn" notices on the display.
THE VISUAL SPECTRUM
Section C: Thermal & Visual Troubleshooting:
Look closely at the Masterclass photo. You should see a uniform, glossy sheen and kernels that are plump but not bursting. If your corn looks shriveled, you have overcooked it, causing the internal moisture to vent out of the kernel walls. If the color is pale or matte, the corn was likely under-hydrated during the steam cycle. To fix a dull appearance, render a small amount of honey into your butter mixture to add a reflective glaze. If you notice uneven browning or spots, it is a sign that the corn was touching the bottom of the pot instead of resting on the trivet. Ensure the corn is elevated to maintain that pristine, steamed aesthetic.
THE DEEP DIVE
Macro Nutrition Profile:
A single ear of corn processed via steam jacket provides approximately 90 calories, 2g of fiber, and 3g of protein. The high-pressure method preserves more Vitamin C and B-vitamins than traditional boiling, as the nutrients are not discarded with the cooking water.
Dietary Swaps (Vegan/Keto/GF):
For a vegan-compliant protocol, substitute the butter with a high-quality avocado oil or coconut manna. To keep it Keto-friendly, avoid the optional sugar boost and focus on heavy salt and grass-fed fats. The recipe is naturally gluten-free, provided your spices are not processed with wheat-based anti-caking agents.
Meal Prep & Reheating Science:
To maintain the molecular structure during reheating, do not use a microwave, which can cause the kernels to become leathery. Instead, use the "Steam" function on your pressure cooker for 1 minute. This re-hydrates the starch molecules without further breaking down the cellulose walls.
THE KITCHEN TABLE
Can I cook frozen corn on the cob?
Yes. Increase the High Pressure execution time to 4 minutes. The internal ice crystals require extra thermal energy to phase-shift into liquid and then steam, ensuring the core reaches a safe and palatable temperature.
Why is my corn mushy?
Mushiness is a result of broken cell walls. This usually happens during a Natural Pressure Release. The extended exposure to heat breaks down the pectin that holds the kernels together. Always use the Manual Release for vegetable protocols.
Do I need to add salt to the water?
No. Adding salt to the pressure cooking water can actually toughen the outer skin of the corn. It is scientifically superior to season the corn after the cooking process is complete to ensure maximum flavor absorption.
How many ears can I cook at once?
As long as you do not exceed the "Max Fill" line and allow for steam gaps, you can stack up to 8 ears in a 6-quart unit. Maintain the 250ml water ratio regardless of the quantity of corn.